Archive SharePoint Using OneDrive
If you delete a file on a SharePoint document library, the file is automatically removed from the OneDrive on your computer. To avoid that, set up archiving files on your computer.
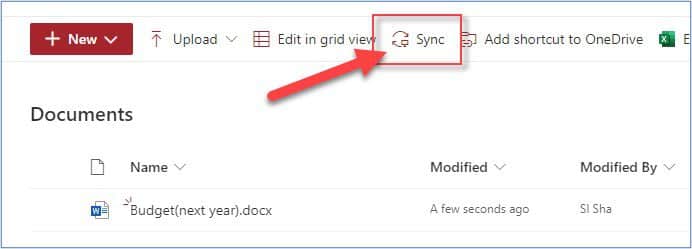
Go to the document library and click “Sync” on the toolbar
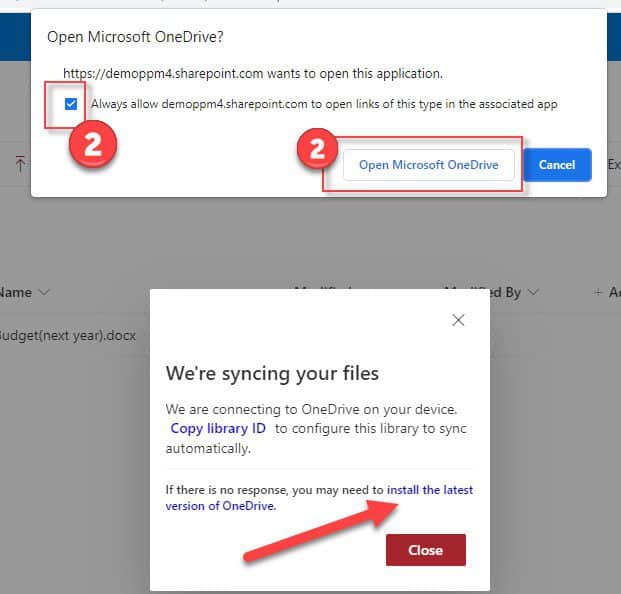
Select “Always allow to open links…” and then click “Open Microsoft OneDrive”
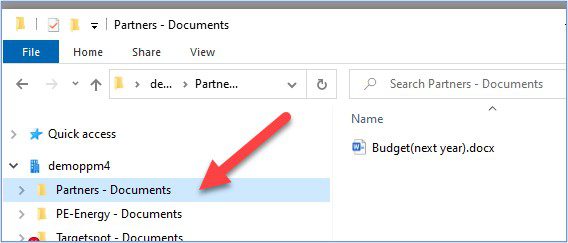
All files from the document library will be synchronized to your PC and available on the native file explorer.
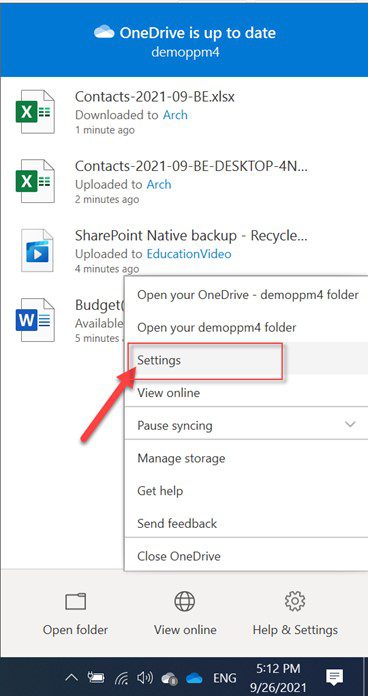
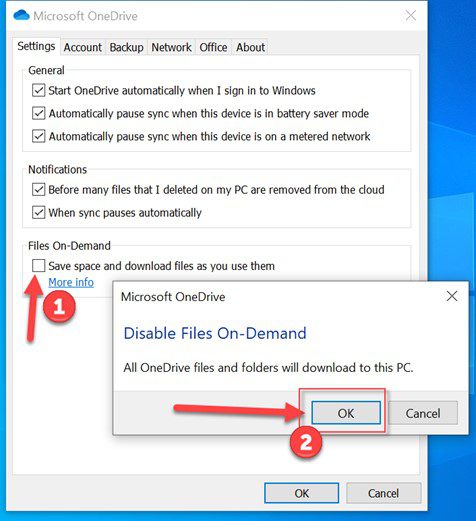
By default, only files that you open are saved on your PC. If you need to archive all files, make these changes to the OneDrive settings.
- In OneDrive“Settings”
- Uncheck “Save space and download files as you use them” and then confirm by clicking “OK”
SharePoint Archiving Solution using Version Control
Every time a file is saved, SharePoint can store the file as a version of the source document. You will then be able to restore any previous version in case of document deletion.
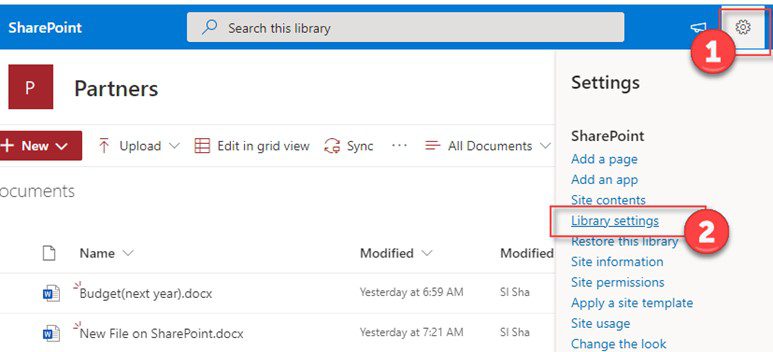
To turn on versioning, go to the document library settings
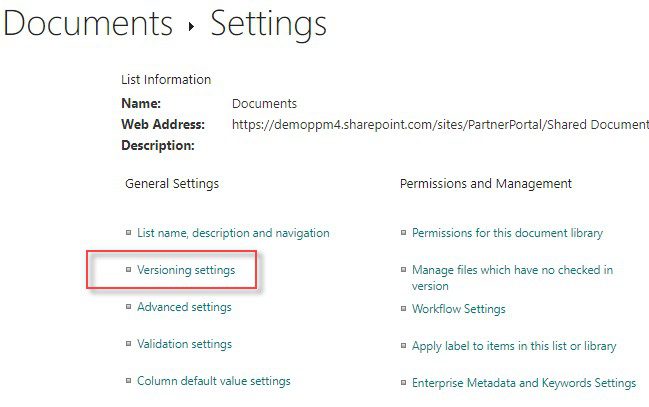
Click on “Versioning settings” under the “General settings” section
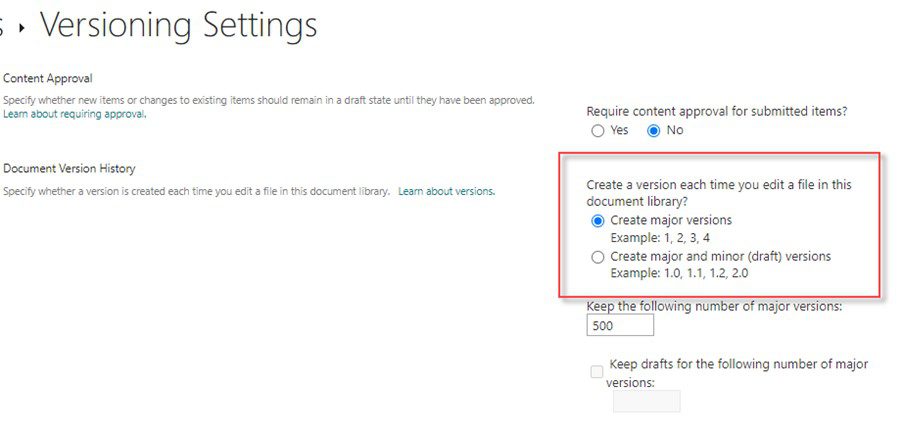
Select either “Create major versions” or “Create major and minor (draft) versions” and click OK
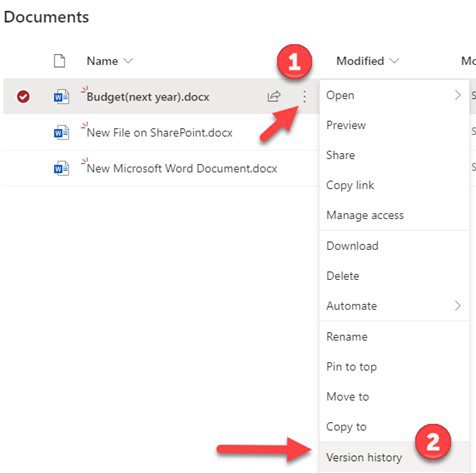
When you wish to restore a version go to the document library, select a document, click on the three dots, and select “Version history”
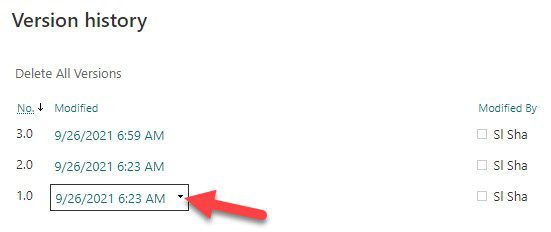
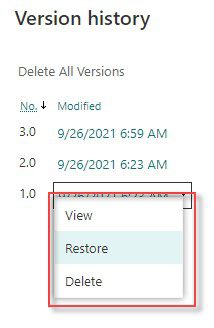
Move the cursor over the version to be restored and click on the small triangle to call a popup menu.
You can either preview the version or restore it
Archive SharePoint using the Retention Policy
Create an “Archive” site and create a retention policy that applies to the content of the SharePoint Archive site. Follow these instructions to set up a SharePoint retention policy via the Compliance Center and how to set up a SharePoint retention policy using PowerShell (videos below)
Via the Compliance Center
Using PowerShell
Archive Library as a SharePoint Archiving Solution
Another native SharePoint archiving solution is to move data to another “archive” library. Create a new library or directory with the name “Archive” and a “Status” label. Add documents that you wish to archive to this library in the same site via the browser. Note: it could cause the document link to change. You can further automate it by creating a workflow in SharePoint Designer that automatically moves documents with a Status as “Archive” to the Archive library that you created.
Limitations of Native SharePoint Archive Solutions
Native SharePoint options have limitations such as only a maximum of 30,000+ – 30,000 files per document library can be synchronized by OneDrive. There are URL size limitations, for example, a 400 character limit to the document library name, folders, and file name. However, native archiving also has critical limitations such as increasing storage costs (or license costs to match the increase in storage size), and the inability to restore data indefinitely.
Get a Customized Backup Quote
The Best Way to Archive SharePoint?
Instead, consider using a third-party backup that allows you to backup your data from Day 1, facilitates quick and easy recovery, and ensures regulatory compliance. CloudAlly Backup for SharePoint securely stores all your SharePoint data on Amazon AWS storage (zero storage costs for you) and provides one-click restore of your data in minutes. Start a free trial now (5 min setup, no credit card required)


