
Companies that completely migrate to Microsoft 365 (formerly Office 365), prefer storing all their files on SharePoint sites and document libraries. Thus, it becomes business-critical to secure this SharePoint data against data loss. We had earlier detailed native options to backup and recover a deleted Sharepoint site. However, such options are time-bound and tedious. Typically, only the entire site collection can be restored, and not a single file. Also, you will lose all changes from the time of file deletion to the point of the site’s restoration. A better native option is to backup important SharePoint files using PowerShell. We explain how you can perform Sharepoint backup and restore using PowerShell:
How To Backup Sharepoint Data and Site Collections Using PowerShell
Step #1 Set up PowerShell
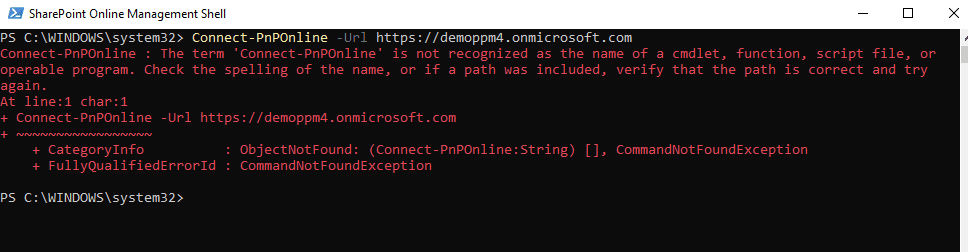
Backup file operations are performed using SharePoint Patterns and Practices (PnP) PowerShell commands (SharePoint PnP). You would first need to Install the latest PowerShell version. If you do not have installed SharePoint PnP PowerShell then you will receive the below error message trying to run a PnP PowerShell script.
You can install it using these steps:
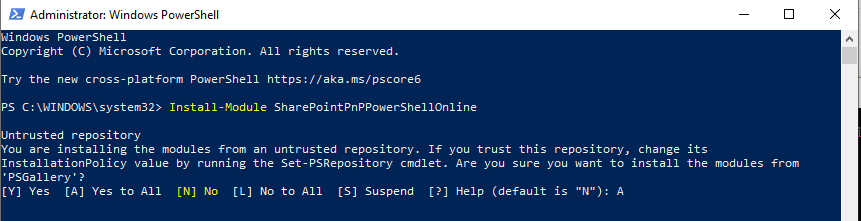
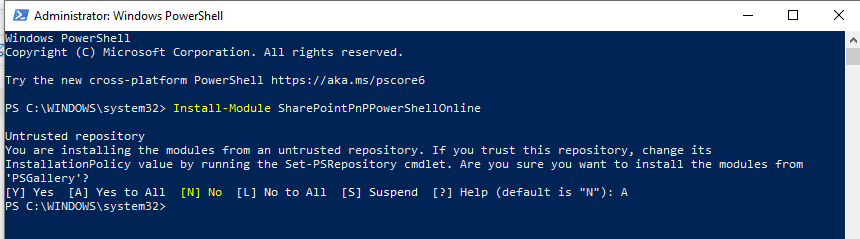
1. Run Windows PowerShell
Install-Module SharePointPnPPowerShellOnline
2. You will be asked to confirm the installation from an untrusted repository. Type “A” to proceed.
3. The installation process will start.

Once the SharePoint PnP PowerShell module is installed, the new command line will be displayed.
Step #2 Backup SharePoint Files Using PowerShell Script
Note: You must be a global administrator in Microsoft 365 (Office 365).
1. First, you must establish a connection with your Microsoft 365 (Office 365) tenant by running the command:
Connect-PnPOnline -Url https://demoppm4.sharepoint.com/sites/Intranet
where the site address should follow the “–Url”. It is https://demoppm4.sharepoint.com/sites/Intranet in our example.
demoppm4 – is the tenant name
sites/Intranet – is the site name where the file is stored

And enter your credentials:

2. The “Get-PnPFile” command is used to back up a file from SharePoint to a local folder
Get-PnPFile -Url "/sites/Intranet/Docs/Financial/Budget-2021.xlsx" -Path C:Backup -FileName "Budget-2021.xlsx"
We are copying the “Budget-2021.xlsx” file from the folder “Financial” of the “Docs” document library on the “Intranet” site to the local computer with the path “C:Backup”. As a result, the file is copied to the “C:Backup” folder.
Disadvantages of SharePoint Backup and Restore Using Powershell
No Alerts: You can schedule and run the backing up script automatically, but you will not be notified about the script failure to fix a possible issue. You can improve the script to check the result of it executing using additional PowerShell commands, however, the script will become more complicated.
No auto-backup of New Sites: Users will keep creating new sites, document libraries, and folders. It will be up to you to modify the script to backup new data sources, to keep your SharePoint backup relevant. You can improve the script and consider all cases and iterate through all site collections, subsites, document libraries, and folders. Thus wasting effort on a highly-complex script that still does not guarantee a full backup.
SharePoint Backup Using CloudAlly
CloudAlly’s SharePoint backup, automates backup of SharePoint Online and OneDrive. Moreover, it comprehensively protects Team Site (and all sub-sites), Public Site (and all sub-sites), private Site Collections, and OneDrive for Business Sites. The backups are immutable and stored on Amazon’s AWS’ highly reliable data centers. This mitigates the risk of ransomware by guaranteeing easy data recovery from ransomware. With CloudAlly SharePoint backup, recovery is a breeze, with provisions for non-destructive restores to the original/new site. Or use in-place restore for SharePoint and OneDrive sites that directly replaces the content of a site rather than creating a subsite to store the recovered data. You can recover deleted SharePoint data from any point-in-time or granular level. Cross-user and cross-tenant recovery is also supported.

SharePoint Recovery Options
SharePoint backup simplifies the process for admin with an initial auto-discovery of all SharePoint or OneDrive sites within the domain. You can then choose to activate backups for all sites or selected sites. After which the auto-detect function for new users/sites can backup all or selected users and multiple domains automatically. Thus all new sites added to the system are backed up without admin intervention.
Advanced user management, transparent status monitoring, email alerts, and activity logs further make backup a no-fuss affair with zero adoption. If an issue were to occur, our Customer Support team is always a call/phone/email/chat away 365x24x7.
In the stressful moments of data loss, you cannot rely on patchy SharePoint backup and restore using PowerShell or other native options. Eliminate the risk of SharePoint data loss and improve disaster recovery with CloudAlly.